
Fitting a Clock Spring
Depending on the vehicles make, the clock spring may also be listed as a clockspring, a spiral cable, body combination switch, cable assembly or another name.
Fitting a clock spring is not a difficult task but consider that for safety reasons it should be performed by a qualified Auto Electrician.
Tools you might need are and OBD2 scanner, A Socket Set, Screwdrivers, Torx or Allen keys.
Although the vehicles manufacturer’s instructions for fitting a clock spring may vary depending on the make and model, the following information may be helpful.
Clock Spring Installation Points
Front wheels facing forward: the front wheels on the vehicle must be facing forward before removing and installing the clock spring / spiral cable. Failure to do this can result in the clock spring cable being overwound and damaged.
Disconnect the negative battery cable: for safety precautions, it’s best to wait for 5 minutes after disconnecting the battery before removing airbag system components.
Don’t remove the plastic locking tab before fitting: when fitting a clock spring it’s important to not remove the plastic locking tab from the clock spring before it has been installed. The locking pin holds the clock spring in a centred position.
If the locking tab has been removed or the clock spring has rotated then it will need to be centred. This can be done by turning the clock spring, counting the number of rotations then dividing this number by 2.
So if the clock spring can rotate 5 full turns then the centre point will be 2.5 turns
Warning: installing a clock spring that hasn’t been centered can result in the clock spring cable being over wound and breaking when the steering wheel is turned.
Remove the steering angle sensor: some vehicles (but not all) have a steering angle sensor fitted attached to the back of the clock spring. If fitted, this steering angle sensor will need removing from the original clock spring and fitting to the new one.
Check below for more information on this.
The error code may need clearing: although sometimes the warning light will disappear once the clock spring has been replaced, the error code may need clearing from the system before the warning light will turn off.

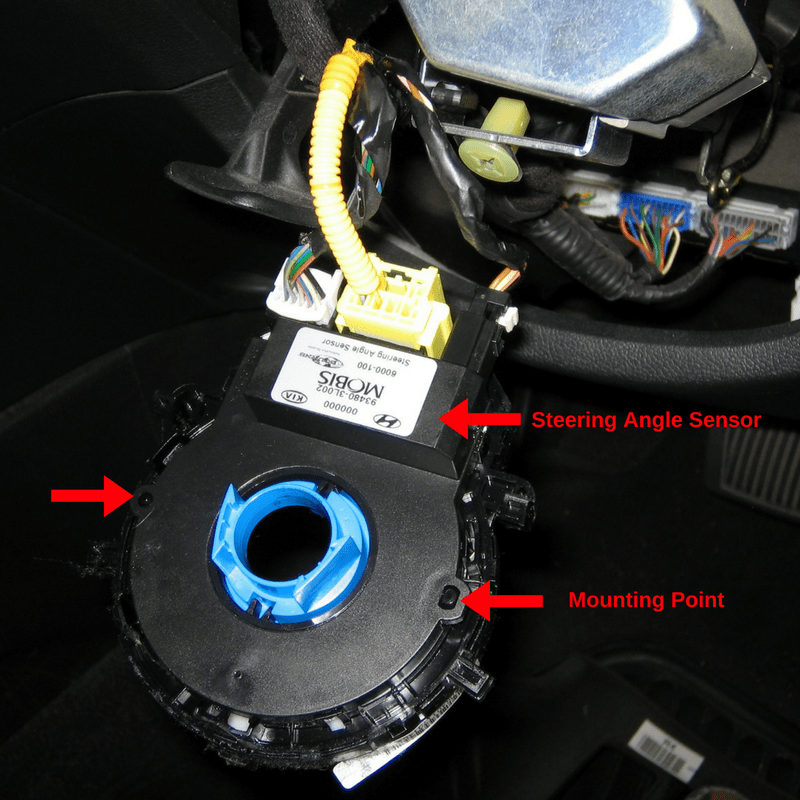
Removing the Steering Angle Sensor
In some cases, the steering angle sensor will need to be removed when fitting a new clock spring.
The steering angle sensor is usually attached to the clock spring by two mounting points and a series of clips. These clips can be undone using a small flat-bladed screwdriver or similar.
Once removed it can be attached to the new clock spring.
Steering Angle Sensor Calibration
If the traction control light turns on you may need to recalibrate the steering angle sensor calibration. This can be done with an OBD2 scanner.